 Arduino - Temperature Humidity Sensor - LCD
We will learn how to:
Read temperature and humidity from DHT11 sensor and display on LCD I2CRead temperature and humidity from DHT22 sensor and display on LCD I2CHardware Required1×Arduino UNO or Genuino UNO1×USB 2.0 cable type A/B1×LCD I2C1×Temperature and Humidity Sensor DHT111×Jumper Wires1×(Optional) 9V Power Adapter for Arduino1×(Recommended) Screw Terminal Block Shield for Arduino Uno1×(Optional) Transparent Acrylic Enclosure For Arduino UnoYou can use DHT22 sensor instead of DHT11 sensor.
Or you can buy the following sensor kits:
1×DIYables Sensor Kit (30 sensors/displays)1×DIYables Sensor Kit (18 sensors/displays)Please note: These are Amazon affiliate links. If you buy the components through these links, We will get a commission at no extra cost to you. We appreciate it.About DHT11, DHT22 and LCDIf you do not know about DHT11, DHT22 temperature sensor and LCD (pinout, how it works, how to program ...), learn about them in the following tutorials:
Arduino - DHT11, DHT22 Temperature Sensor tutorialArduino - LCD I2C tutorialWiring DiagramArduino - DHT11 Module LCD Wiring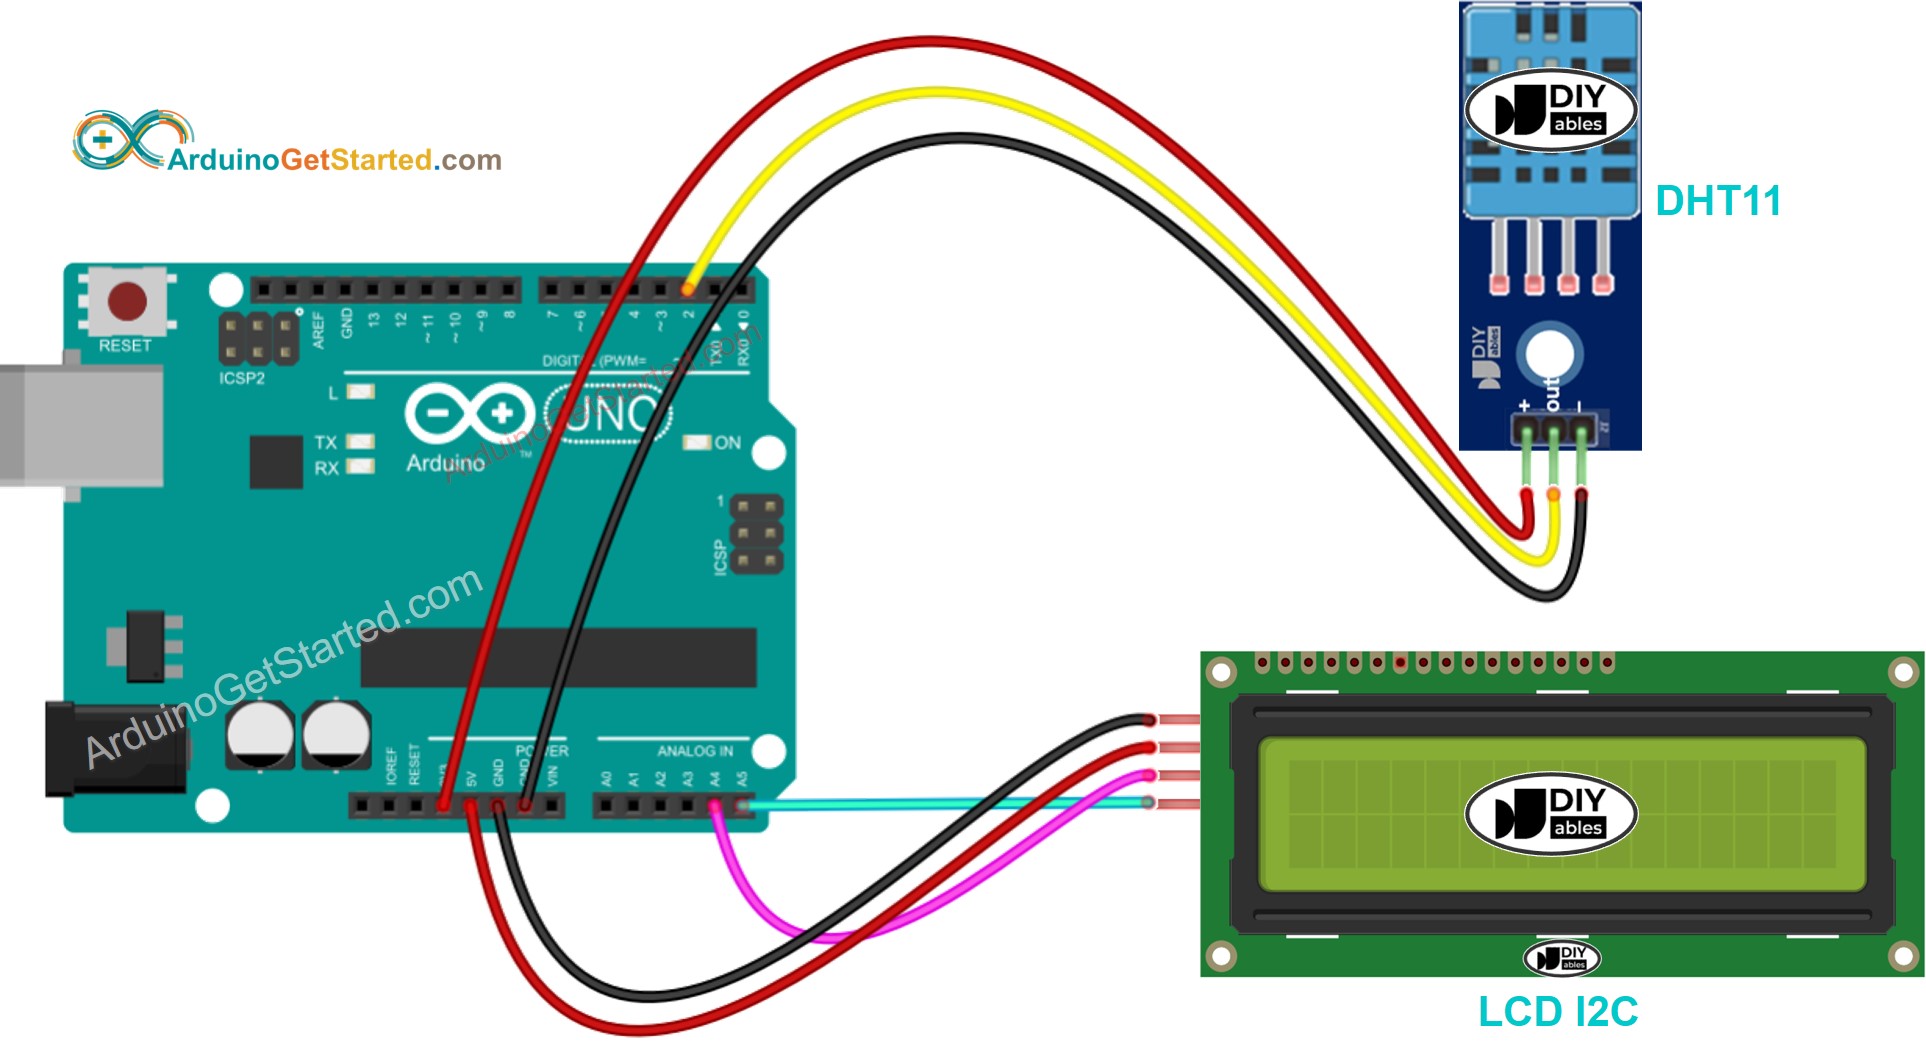
This image is created using Fritzing. Click to enlarge image
Arduino - DHT22 Module LCD Wiring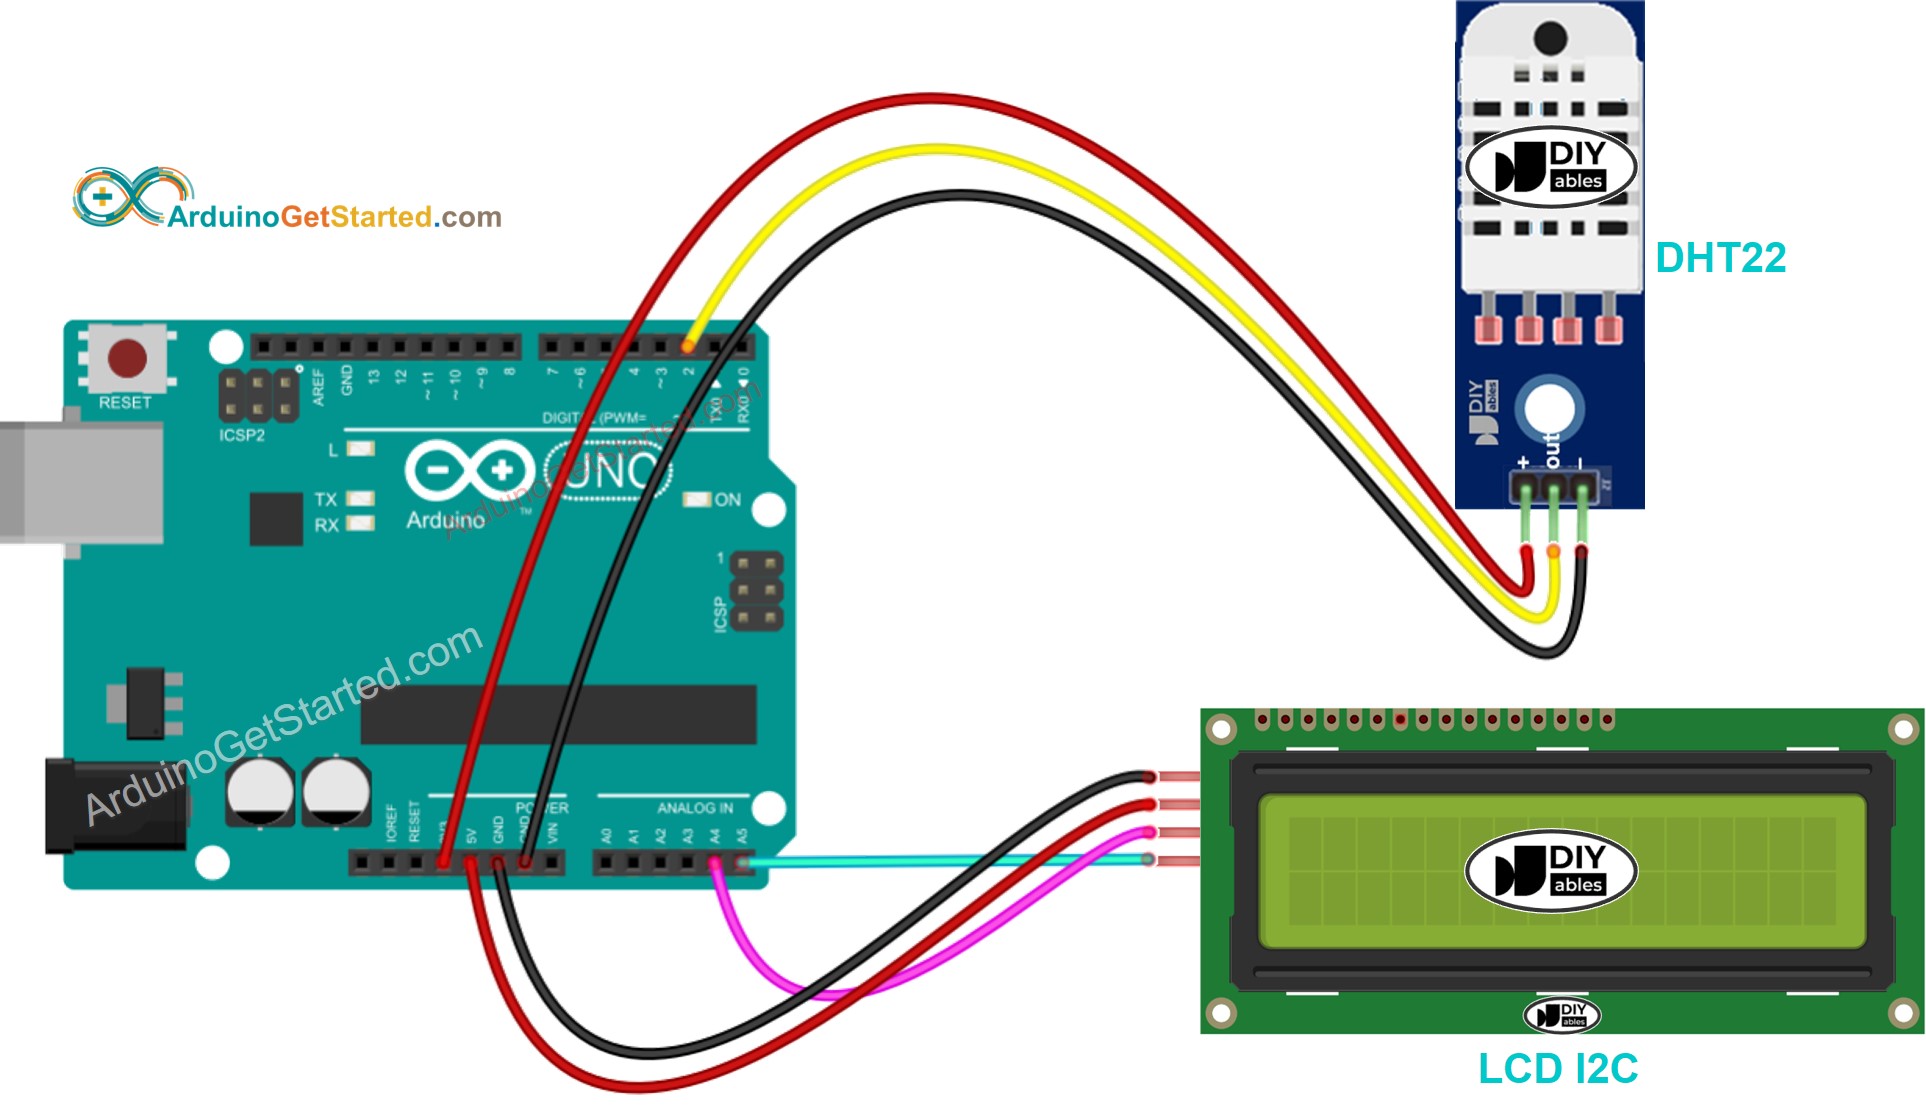
This image is created using Fritzing. Click to enlarge image
Real wiring for DHT11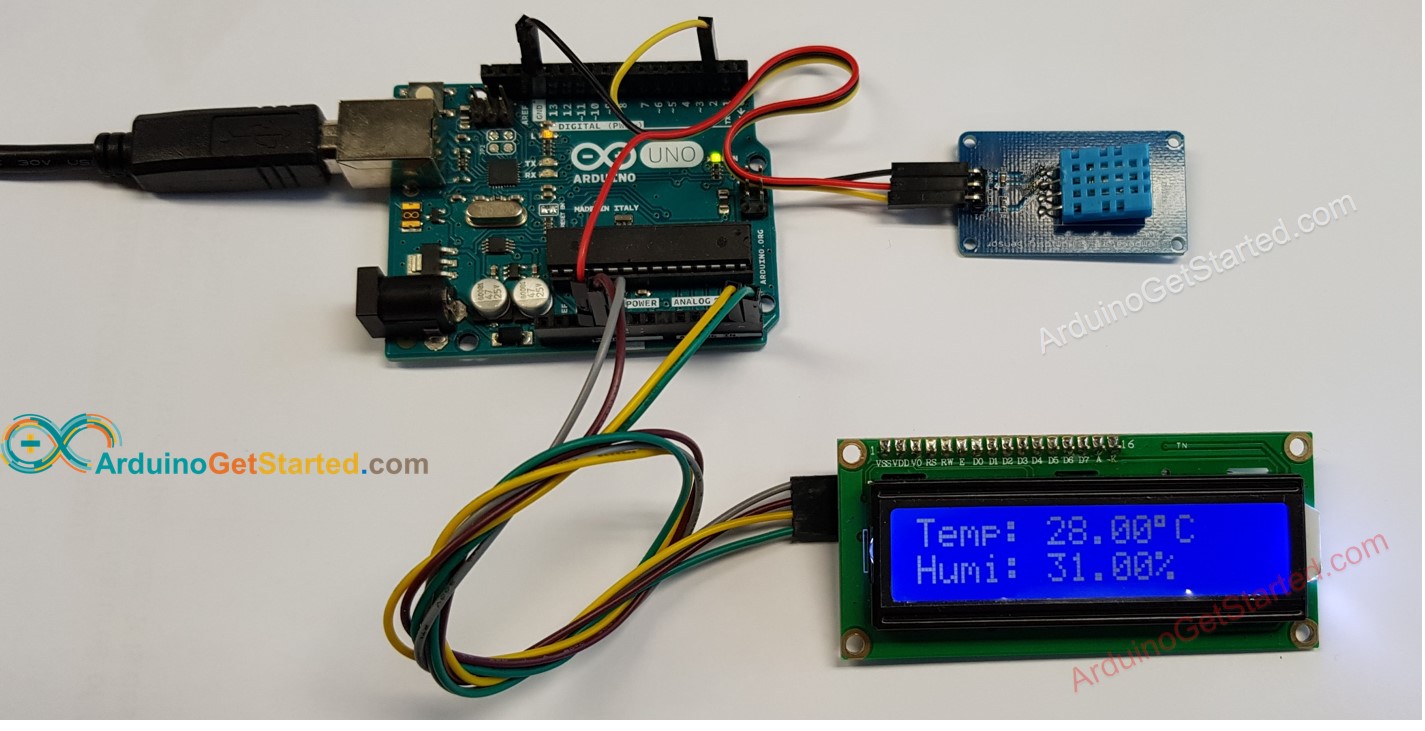
This image is created using Fritzing. Click to enlarge image
Arduino Code - DHT11 Sensor - LCD I2C/* * Created by ArduinoGetStarted.com * * This example code is in the public domain * * Tutorial page: https://arduinogetstarted.com/tutorials/arduino-temperature-humidity-sensor-lcd */#include #include "DHT.h"#define DHTPIN 2#define DHTTYPE DHT11LiquidCrystal_I2C lcd(0x27, 16, 2); // I2C address 0x27 (from DIYables LCD), 16 column and 2 rowsDHT dht(DHTPIN, DHTTYPE);void setup(){ dht.begin(); // initialize the sensor lcd.init(); // initialize the lcd lcd.backlight(); // open the backlight }void loop(){ delay(2000); // wait a few seconds between measurements float humi = dht.readHumidity();// read humidity float tempC = dht.readTemperature(); // read temperature lcd.clear(); // check if any reads failed if (isnan(humi) || isnan(tempC)) {lcd.setCursor(0, 0);lcd.print("Failed"); } else {lcd.setCursor(0, 0); // start to print at the first rowlcd.print("Temp: ");lcd.print(tempC); // print the temperaturelcd.print((char)223); // print ° characterlcd.print("C");lcd.setCursor(0, 1); // start to print at the second rowlcd.print("Humi: ");lcd.print(humi); // print the humiditylcd.print("%"); }}※ NOTE THAT:
The I2C address of LCD can vary according to the manufacturers. In the code, we used 0x27 that is specified by DIYables manufacturer
Quick StepsConnect Arduino to PC via USB cableOpen Arduino IDE, select the right board and portNavigate to the Libraries icon on the left bar of the Arduino IDE.Search “DHT”, then find the DHT sensor library by AdafruitClick Install button to install the library.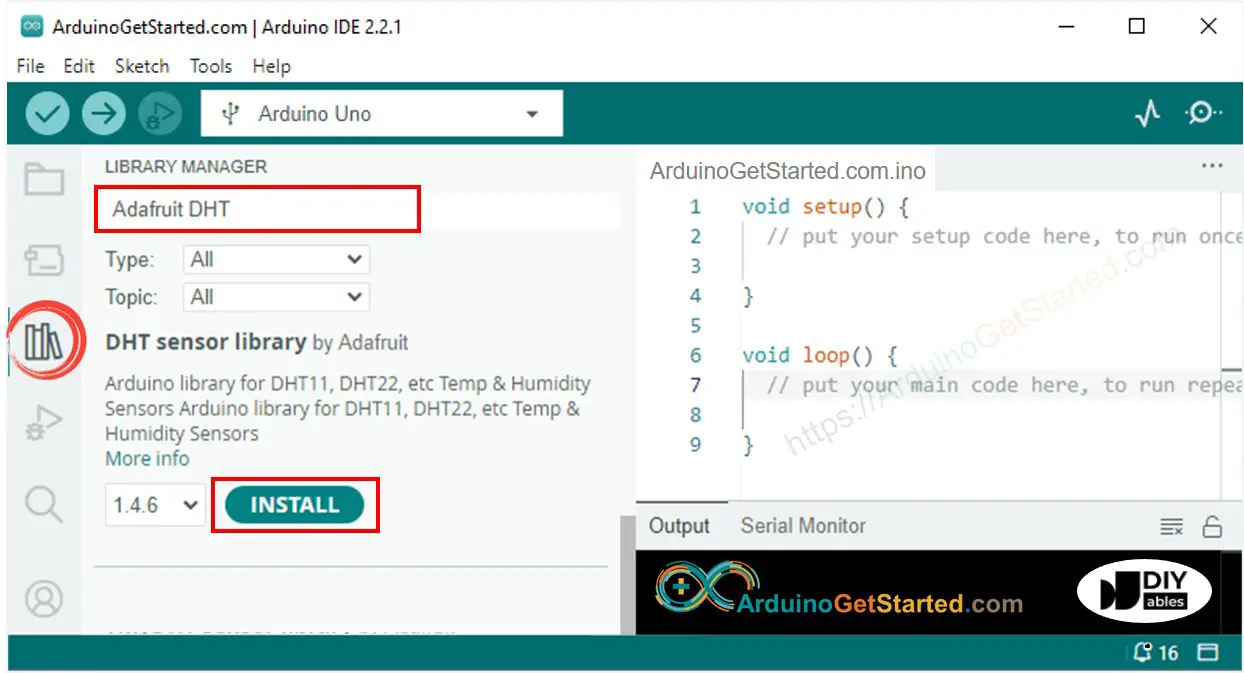 You will be asked for intalling some other library dependenciesClick Install All button all library dependencies.
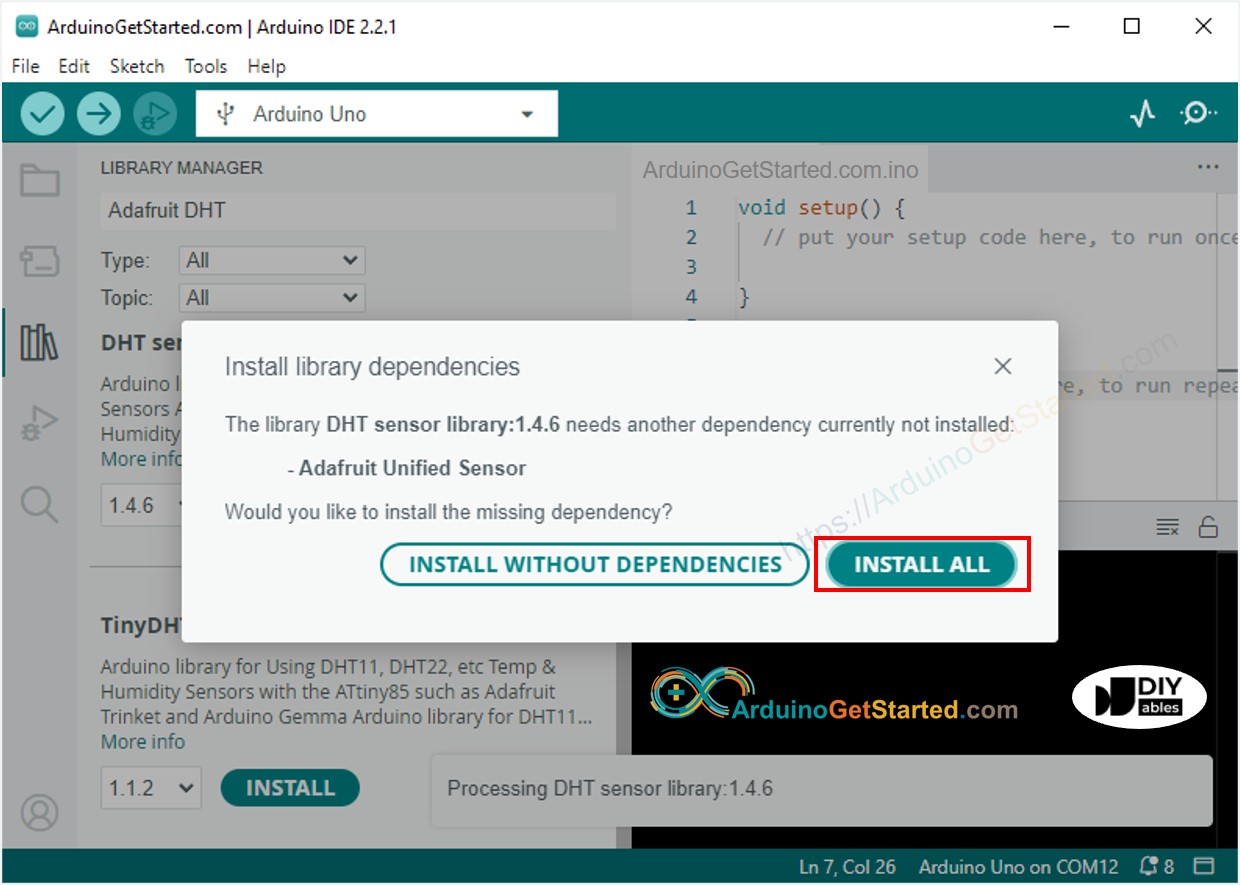 Search “LiquidCrystal I2C”, then find the LiquidCrystal_I2C library by Frank de BrabanderClick Install button to install LiquidCrystal_I2C library.
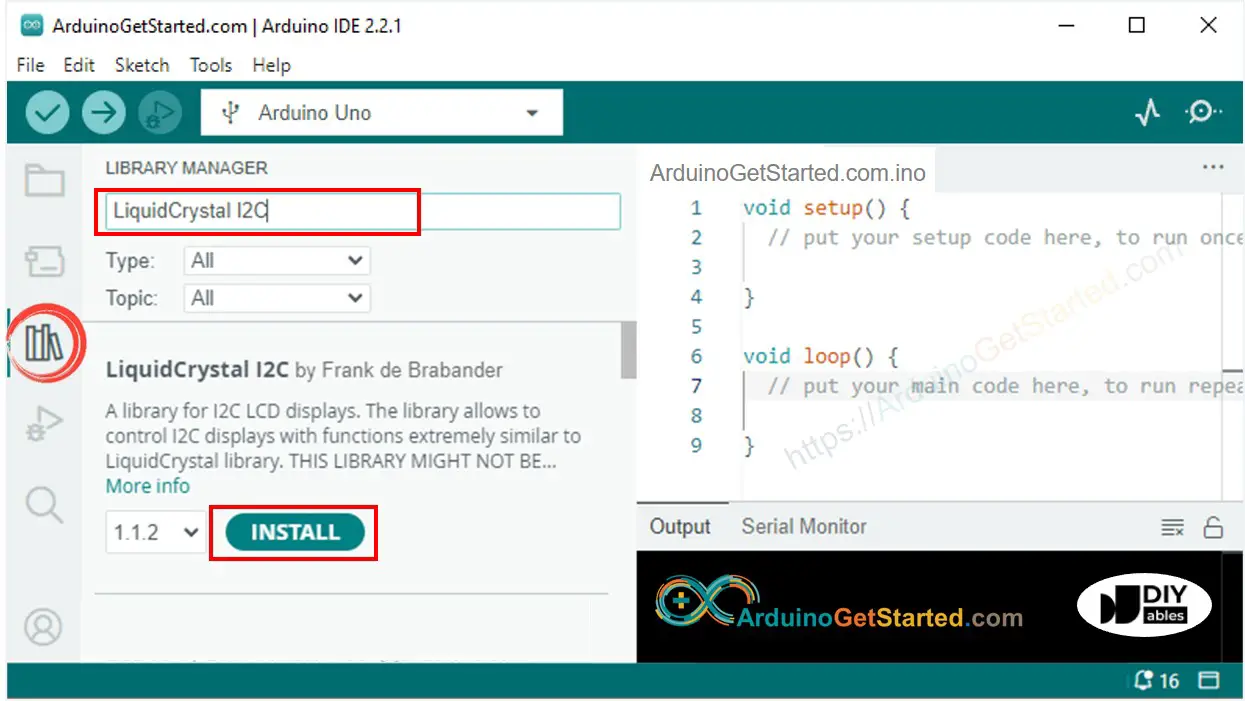 Copy the above code and open with Arduino IDEClick Upload button on Arduino IDE to upload code to ArduinoMake enviroment around sensor hotter or colderSee the result in LCD
This image is created using Fritzing. Click to enlarge image
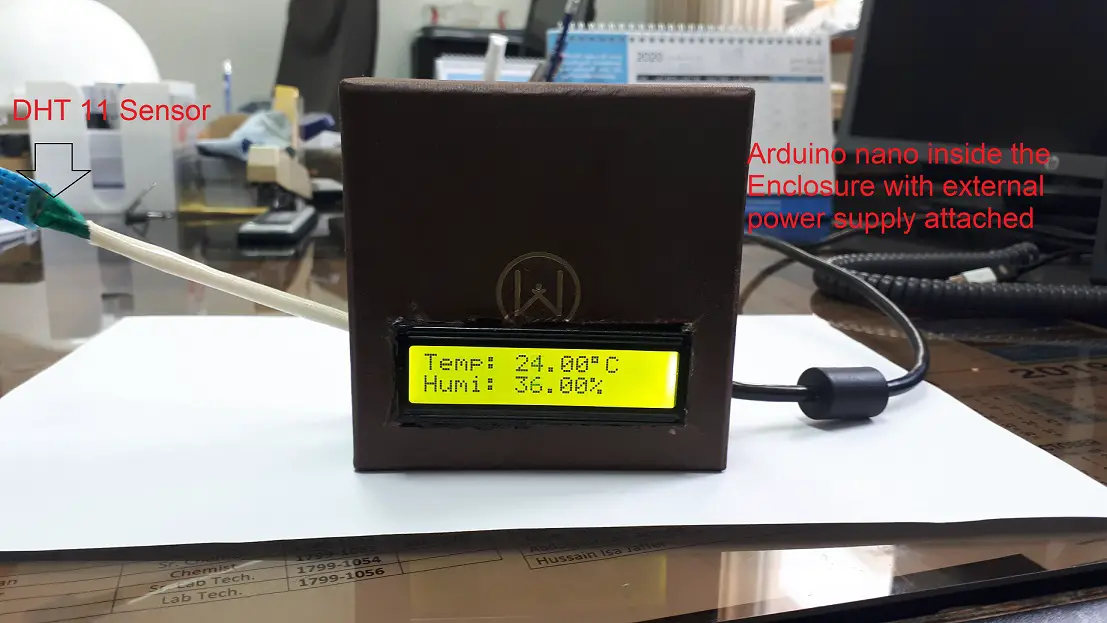
The above code also work for Arduino Nano. A grandfather, who learns through this tutorial to guide his grandchild has tested this code with Arduino Nano and send us the result like below:
If LCD displays nothing, see Troubleshooting on LCD I2C
Arduino Code - DHT22 Sensor - LCD I2C/* * Created by ArduinoGetStarted.com * * This example code is in the public domain * * Tutorial page: https://arduinogetstarted.com/tutorials/arduino-temperature-humidity-sensor-lcd */#include #include "DHT.h"#define DHTPIN 2#define DHTTYPE DHT22LiquidCrystal_I2C lcd(0x27, 16, 2); // I2C address 0x27 (from DIYables LCD), 16 column and 2 rowsDHT dht(DHTPIN, DHTTYPE);void setup(){ dht.begin(); // initialize the sensor lcd.init(); // initialize the lcd lcd.backlight(); // open the backlight }void loop(){ delay(2000); // wait a few seconds between measurements float humi = dht.readHumidity();// read humidity float tempC = dht.readTemperature(); // read temperature lcd.clear(); // check if any reads failed if (isnan(humi) || isnan(tempC)) {lcd.setCursor(0, 0);lcd.print("Failed"); } else {lcd.setCursor(0, 0); // start to print at the first rowlcd.print("Temp: ");lcd.print(tempC); // print the temperaturelcd.print((char)223); // print ° characterlcd.print("C");lcd.setCursor(0, 1); // start to print at the second rowlcd.print("Humi: ");lcd.print(humi); // print the humiditylcd.print("%"); }}※ NOTE THAT:
Code for DHT11 and DHT22 are identical except for one line of code. Library for DHT11 and DHT22 are the same.
Video TutorialWe are considering to make the video tutorials. If you think the video tutorials are essential, please subscribe to our YouTube channel to give us motivation for making the videos.
The Best Arduino Starter KitSee the best Arduino kit for beginnerSee AlsoArduino - Temperature SensorArduino - Temperature Sensor - LCDArduino - Temperature Sensor - OLEDArduino - Temperature via WebArduino - Temperature Sensor - Servo MotorArduino - Temperature Sensor - RelayArduino - DHT11Arduino - DHT22Arduino - Temperature Humidity SensorArduino - Temperature Humidity Sensor - OLED DisplayArduino - LM35 Temperature SensorArduino - TMP36 Temperature SensorArduino - Display Temperature from LM35 Sensor on OLEDArduino - Display Temperature from LM35 Sensor on LCDArduino - Control TemperatureArduino - Cooling System using DHT SensorArduino - Cooling System using DS18B20 Temperature SensorArduino - Heating SystemArduino - DHT11 - RelayArduino - DHT11 - OLEDArduino - DHT11 - LCDArduino - DHT22 - RelayArduino - DHT22 - OLEDArduino - DHT22 - LCDArduino - Temperature - Send Email Notification※ OUR MESSAGES
We are AVAILABLE for HIRE. See how to hire us to build your projectIf this tutorial is useful for you, please give us motivation to make more tutorials.You can share the link of this tutorial anywhere. Howerver, please do not copy the content to share on other websites. We took a lot of time and effort to create the content of this tutorial, please respect our work! PREVIOUSNEXT DISCLOSUREArduinoGetStarted.com is a participant in the Amazon Services LLC Associates Program, an affiliate advertising program designed to provide a means for sites to earn advertising fees by advertising and linking to Amazon.com, Amazon.it, Amazon.fr, Amazon.co.uk, Amazon.ca, Amazon.de, Amazon.es, Amazon.nl, Amazon.pl and Amazon.seCopyright © 2018 - 2024 ArduinoGetStarted.com. All rights reserved. Terms and Conditions | Privacy PolicyEmail: ArduinoGetStarted@gmail.com